How To Import And Organize Media In Adobe Lightroom
Building on our media management post, this article walks you through how to import and organize media in Adobe Lightroom. We follow much of the same format from the previous article, but this time we take advantage of the streamlined workflow in Lightroom. You can replicate some of the principles using the free Photos application with a Mac, but I don’t find it as efficient for organization. For example, Lightroom automatically catalogs photos and videos into folders on your hard drive by date, and it includes additional features that make it easier to find photos in the future.
When you first install Lightroom, you will need to create a folder to house your photo and video files. We use a cleverly named folder, LRPhoto, for all of our media files, and Lightroom does the rest. The folder labeled Lightroom contains the Lightroom catalog file. This file is like a little database that tracks your edits and the various folders that contain your media files.
Here is how the folder with our media looks:
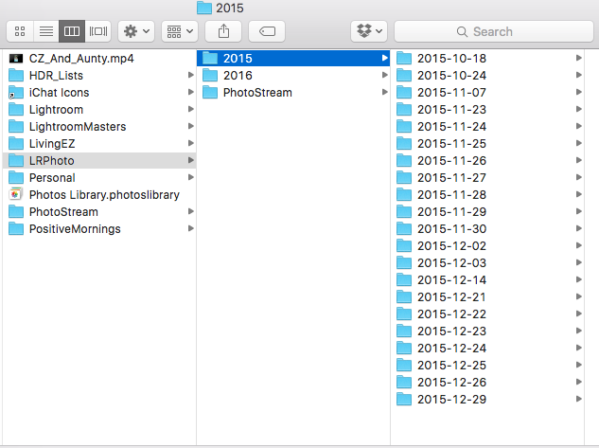
This is nice if you need to find something from a specific day, but scary until you organize everything in Lightroom. Notice that I have a folder named PhotoStream. Since I am on a Mac, I have a utility that automatically downloads the pictures from my phone to a folder that Lightroom scans to automatically import into my catalog. I will drag specific photos to collections when relevant, but otherwise I leave the iphone shots here. You can see in the image below, the folders and the collections.
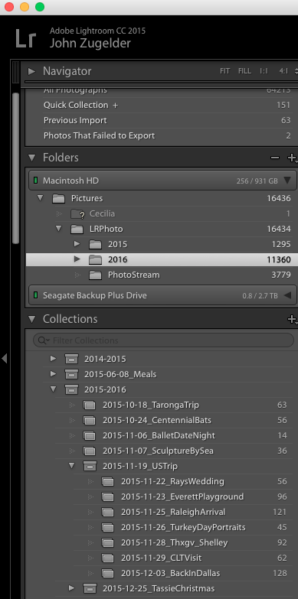
With the collections, you have the opportunity to group collections within collection sets. As you can see above, I have specific collections for the different parts of our US trip last year residing in a USTrip collection set. I start every collection name with the date format I mentioned in the last post to keep them sorted chronologically. The USTrip collection set actually sits within another collection set: the 2015-2016 year. I choose all of this at import, and it keeps our files tidy.
How To Import And Organize Media In Adobe Lightroom
Create a collection set for your top level date grouping. Scroll down the navigation pane to “Collections” and clicking the + button. For us, we mark the calendar based on our anniversary, so the years are “2014-2015” and “2015-2016.” All media pre-Lightroom falls into an archive folder.
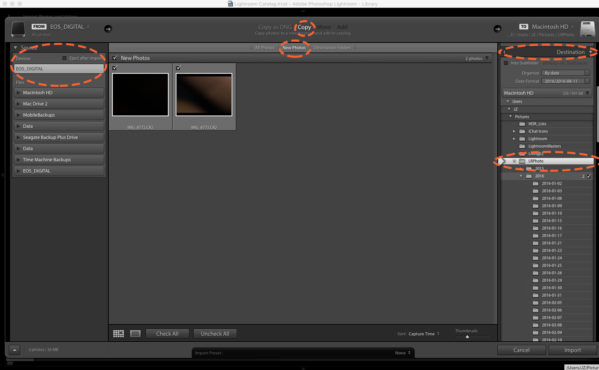
Click “File” in the menubar, and select “Import Photos and Videos.” This brings up the import window. Notice the circles, we have a memory card slot, so the memory card is directly in our computer.
I select copy in the middle top because I want to save the photos until after they finish importing. I will delete them from the card manually.
I click “New Photos” so that it hides previous imported photos. This is nice if I miss a day or two of importing photos. I can start at the bottom and work my way through the thumbnails.
On the right side, I scroll down to destination, and select the folder that will contain the media files.
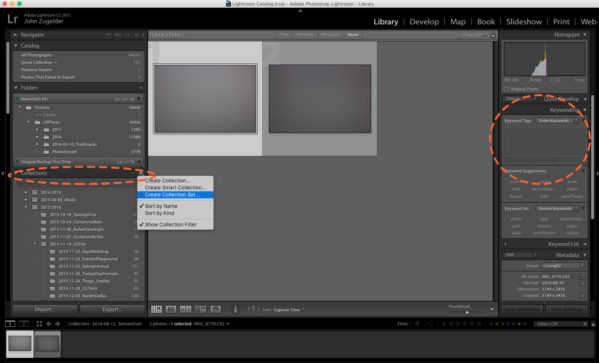
 Scroll up to the “file handling” section, and check the box that says “Don’t import suspected duplicates.” Then you will check the “Add to collection box”, which brings up your collections and a + button.
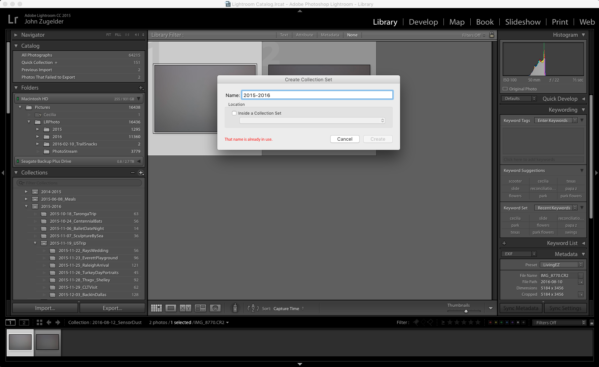
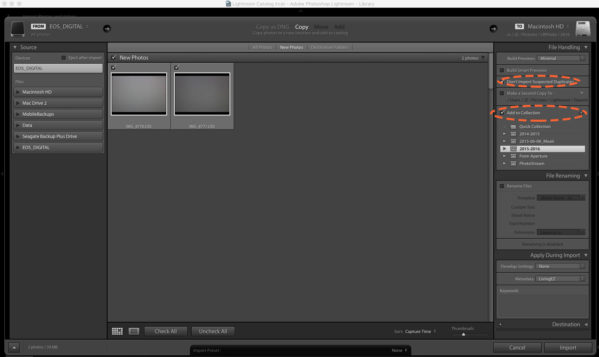 Use the + button to create a new collection for the media files selected to import, and it will pop up a create collection dialog. Check the box labeled “inside a collection set,” and select the correct year. Then name this collection. In my example, I am working on a post for identifying dust on your camera sensor so I labeled mine with the date and “SensorDust.”
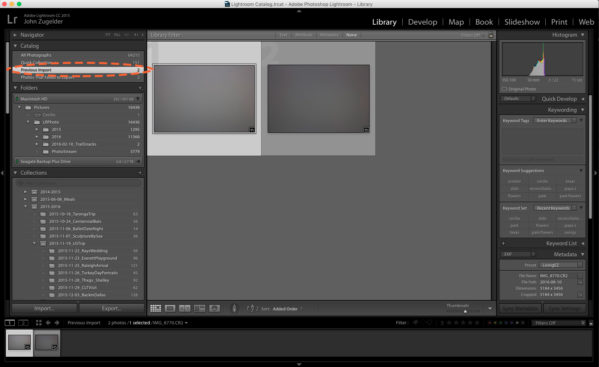
 Click the import button, and Lightroom takes you to the library section for your previous import, where you will see the photos and videos you imported.
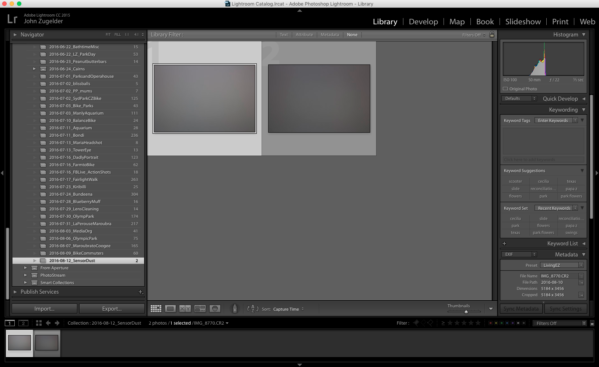
The images are also available, if you scroll down the navigation pane to the collections section. Here you will find the collection created during the import process (dust on the sensor is hard to see before properly editing the photos, so these images look grey for now).
Now your photos are easily available in Lightroom, and organized on your hard drive. You will also be able to access the photos and videos from iMovie if you want to use them to create family videos.
One last note, we share some of our best tips and up to date camera news in our bimonthly newsletter. Make sure you sign up for our photo tips newsletter to gain access to our library of subscriber-only photo tutorials!


3 Responses
[…] This where you select the export location options. We use a specific folder – read more about our folder structure here. […]
[…] RAW, and you may want a 32GB SD card. JPEG photos take up considerably less space. Check out our post on media management for tips on how to organize your photo collection on the […]
[…] How To Import And Organize Media In Adobe Lightroom […]