Basics of ISO – 5 Tips & Tricks for Less Grainy Photos
Are you struggling with grainy photos at night or indoors? This distortion is caused by a higher ISO. Here’s an analogy that might clarify the relationship of ISO to photo quality.
Have you ever noticed that cracking and popping when you crank up a stereo all the way, or perhaps that horrendous screeching noise when someone talks into a microphone with the volume up too loud? That distortion is from the amplification of the sound, and it is very similar to the noise found in photos taken with higher ISO values. That said, feel free to skip to the bottom if you could care less about the details. Otherwise, let’s start learning about the basics of ISO.

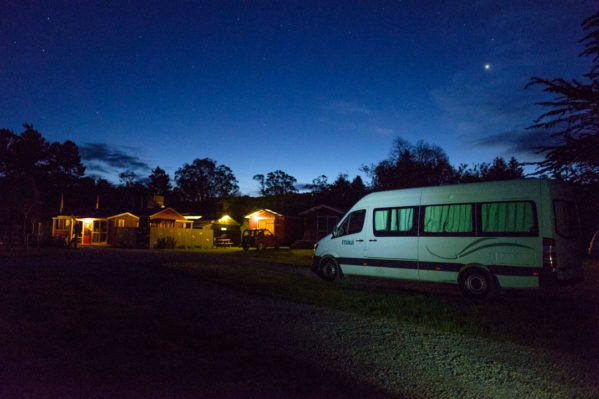
ISO:800
Basics of ISO – What is it?
ISO is a legacy term from the days of film. The number originally represented the speed of the film: higher numbers require longer shutter speeds to capture a properly exposed image. In the world of digital cameras, it has a similar function, but now it is a representation of how much the camera sensor amplifies the light signal for a photograph.
The short answer: in the context of my previous analogy – ISO is the stereo volume knob, and instead of sound, it turns of up light.
ISO:6400
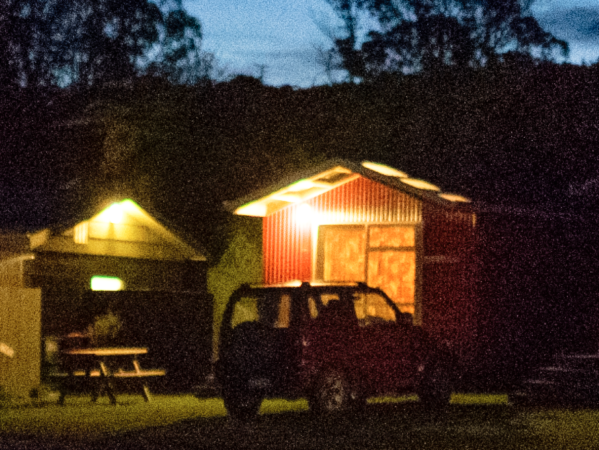
zoomed in portion of the photo
Basics of ISO – A Practical Explanation
In the intro, I mentioned the crackling of stereo speakers when turned too loud. This is especially noticeable on smaller, cheaper speakers. Imagine you have an iPhone that stuck at one volume.
After plugging the iPhone into your speaker, you can’t hear any sound, so you turn up the volume directly on the speaker. As you increase the volume, you start to hear the music. If you continue to turn the knob, it will become loud enough. Finally, the speakers start cracking and popping after you reach a certain volume. At this point, the distortion is so bad that you prefer not to listen to the music at all. As the speaker increases amplifying the signal, the distortion . ISO works the same way.
ISO amplifies the light signal on the camera sensor, and as you increase the ISO it introduces distortion into your photograph. The distortion presents as grainy dots on your photos, and when used artistically, it can give photos a gritty, film ambience. This is akin to the distortion that makes rock music so powerful. However, that’s not the look you want for your newborn photos.
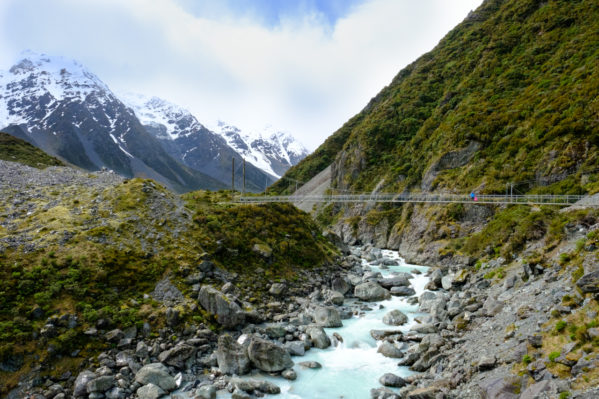
ISO:1600
Basics of ISO – The Numbers
The ISO values start at 100. The maximum limit continues to rise as technology improves and becomes more accessible. Our Fuji X-T2 has a maximum ISO of 51,200!
All you need to know is that higher numbers yield higher amplification of the light. From ISO 100 to 200, the amount of light doubles. The amount of light doubles every time the ISO number doubles (100, 200, 400, 800, 1600, and so on.) The trade-off is that the noise also increases, as you can see in the photos below. It was a bright, sunny afternoon, and I cropped the photo to highlight the details.
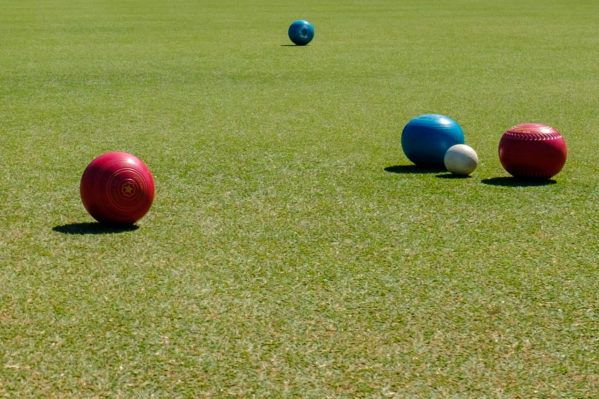
ISO 200
ISO 400

ISO 6400
Basics of ISO – 5 Tips & Tricks
Auto ISO is your friend. Using the Auto ISO feature means you don’t risk losing a moment while fumbling with exposure settings. Most cameras have a max auto ISO setting that you can configure.
The X-T2 actually has three! We programmed a custom function button to loop through them. We set the ISO to 800, 1600, and 3200. Then we choose the appropriate cap depending on the day. If your camera only has one Auto ISO value, set it at the max value that produces acceptable images.
Summer – 100 / Spring & Autumn – 200 / Winter – 400 – An interesting rule of thumb that helps when considering the weather than the season. However, it’s a great place to start when evaluating outdoor shooting conditions.
Lower ISO numbers produce sharper images in most situations. The lower light amplification produces less grain / noise, and the pictures look sharper. However, it also depends on the image size. What looks sharp on a 4 x 6 print might not look as good at 8 x 10.
ISO 400 and 800 are good values for shade and very cloudy days. The reduced light in the shade, or even on a cloudy day, requires slightly higher ISO values. However, sometimes it’s preferable to shoot in the shade – especially on extremely bright days (read more tips for shooting in the bright sun)
Overexpose just a little when using higher ISO values. When editing photos, it produces less noise to reduce the exposure of the image than increasing the exposure. This can be done with the exposure compensation adjustment, bracketing, or by operating in manual mode.
When properly exposing your image, choosing the correct ISO will ensure that your photo has the least grain and noise. Let us know how you go!


1 Response
[…] drive your image exposure and sharpness are ISO, aperture, and shutter speed. I covered choosing ISO here, and shutter speed is next week’s post. When starting out, I recommend cycling through the […]