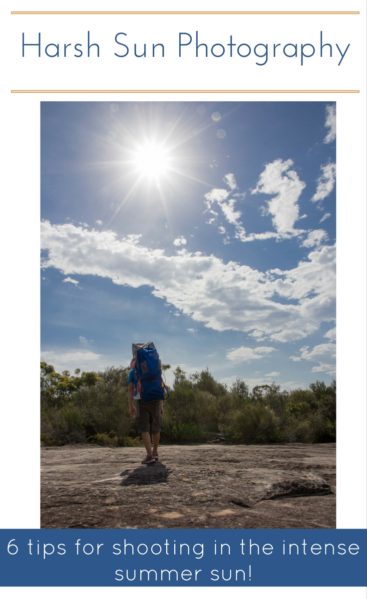
6 Tips for Shooting in Harsh Sunlight
Our mission to learn about photography started the day we met, and we constantly consume blogs, books, and articles on everything and anything photography related. Now that we are a few years into the journey, we read the same advice over and over again. We usually stick to the “rules”: the rule of thirds, the sunny 16 rule, leading lines, and so on. However, with a child, the one “rule” that we continually break is: shoot in the morning and evening light – never in midday harsh sunlight.
Unfortunately for many parents, the morning and evening are the most difficult times to get out with our cameras, and the hardest times to work with our favorite subjects. We have little people to get ready for the day or night, and feel guilty dragging them along for our early morning or evening photo escapades. So what is an amateur photographer/parent to do? After enough failed attempts with the heavy DSLR at the park, many parents we know chuck the DSLR into the closet and leave it, choosing to go with the camera phone already in their pocket.
We definitely started slipping in to this phase a little, when first battling the harsh intensity of the Australian sunlight, but thankfully, we managed to push through. In our experience, you can still capture beautiful moments without the golden glow of sunrise or that beautiful blue house before sunset.
It just requires you to look beyond the objects around you to see them as photo accessories. The world is full of diffusers, reflectors, and dramatic lighting. All you need to do is look for them, remember a few camera settings (I carried a physical cheat sheet for the longest time), and perhaps embrace more artistic photos.
Strategies for Shooting in Harsh Sunlight
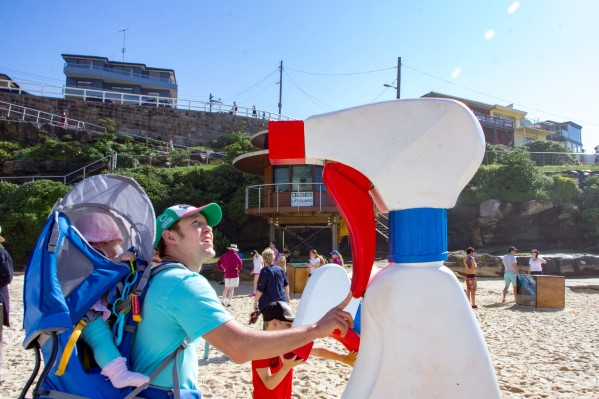
Reflective surfaces – Deep shadows are common when the sun is beating down from above. The shadows can be particularly distracting when photographing people. Leverage reflective surfaces in your surroundings like concrete, sand, water, or, if you’re lucky, large white walls to bounce some light back onto your subject. We love the neutral cast of concrete in our city shots, and the golden glow of the sand serves you well at the beach.

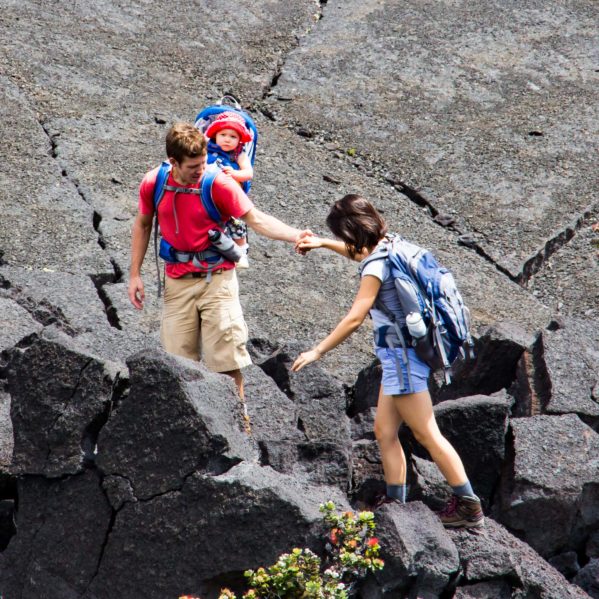
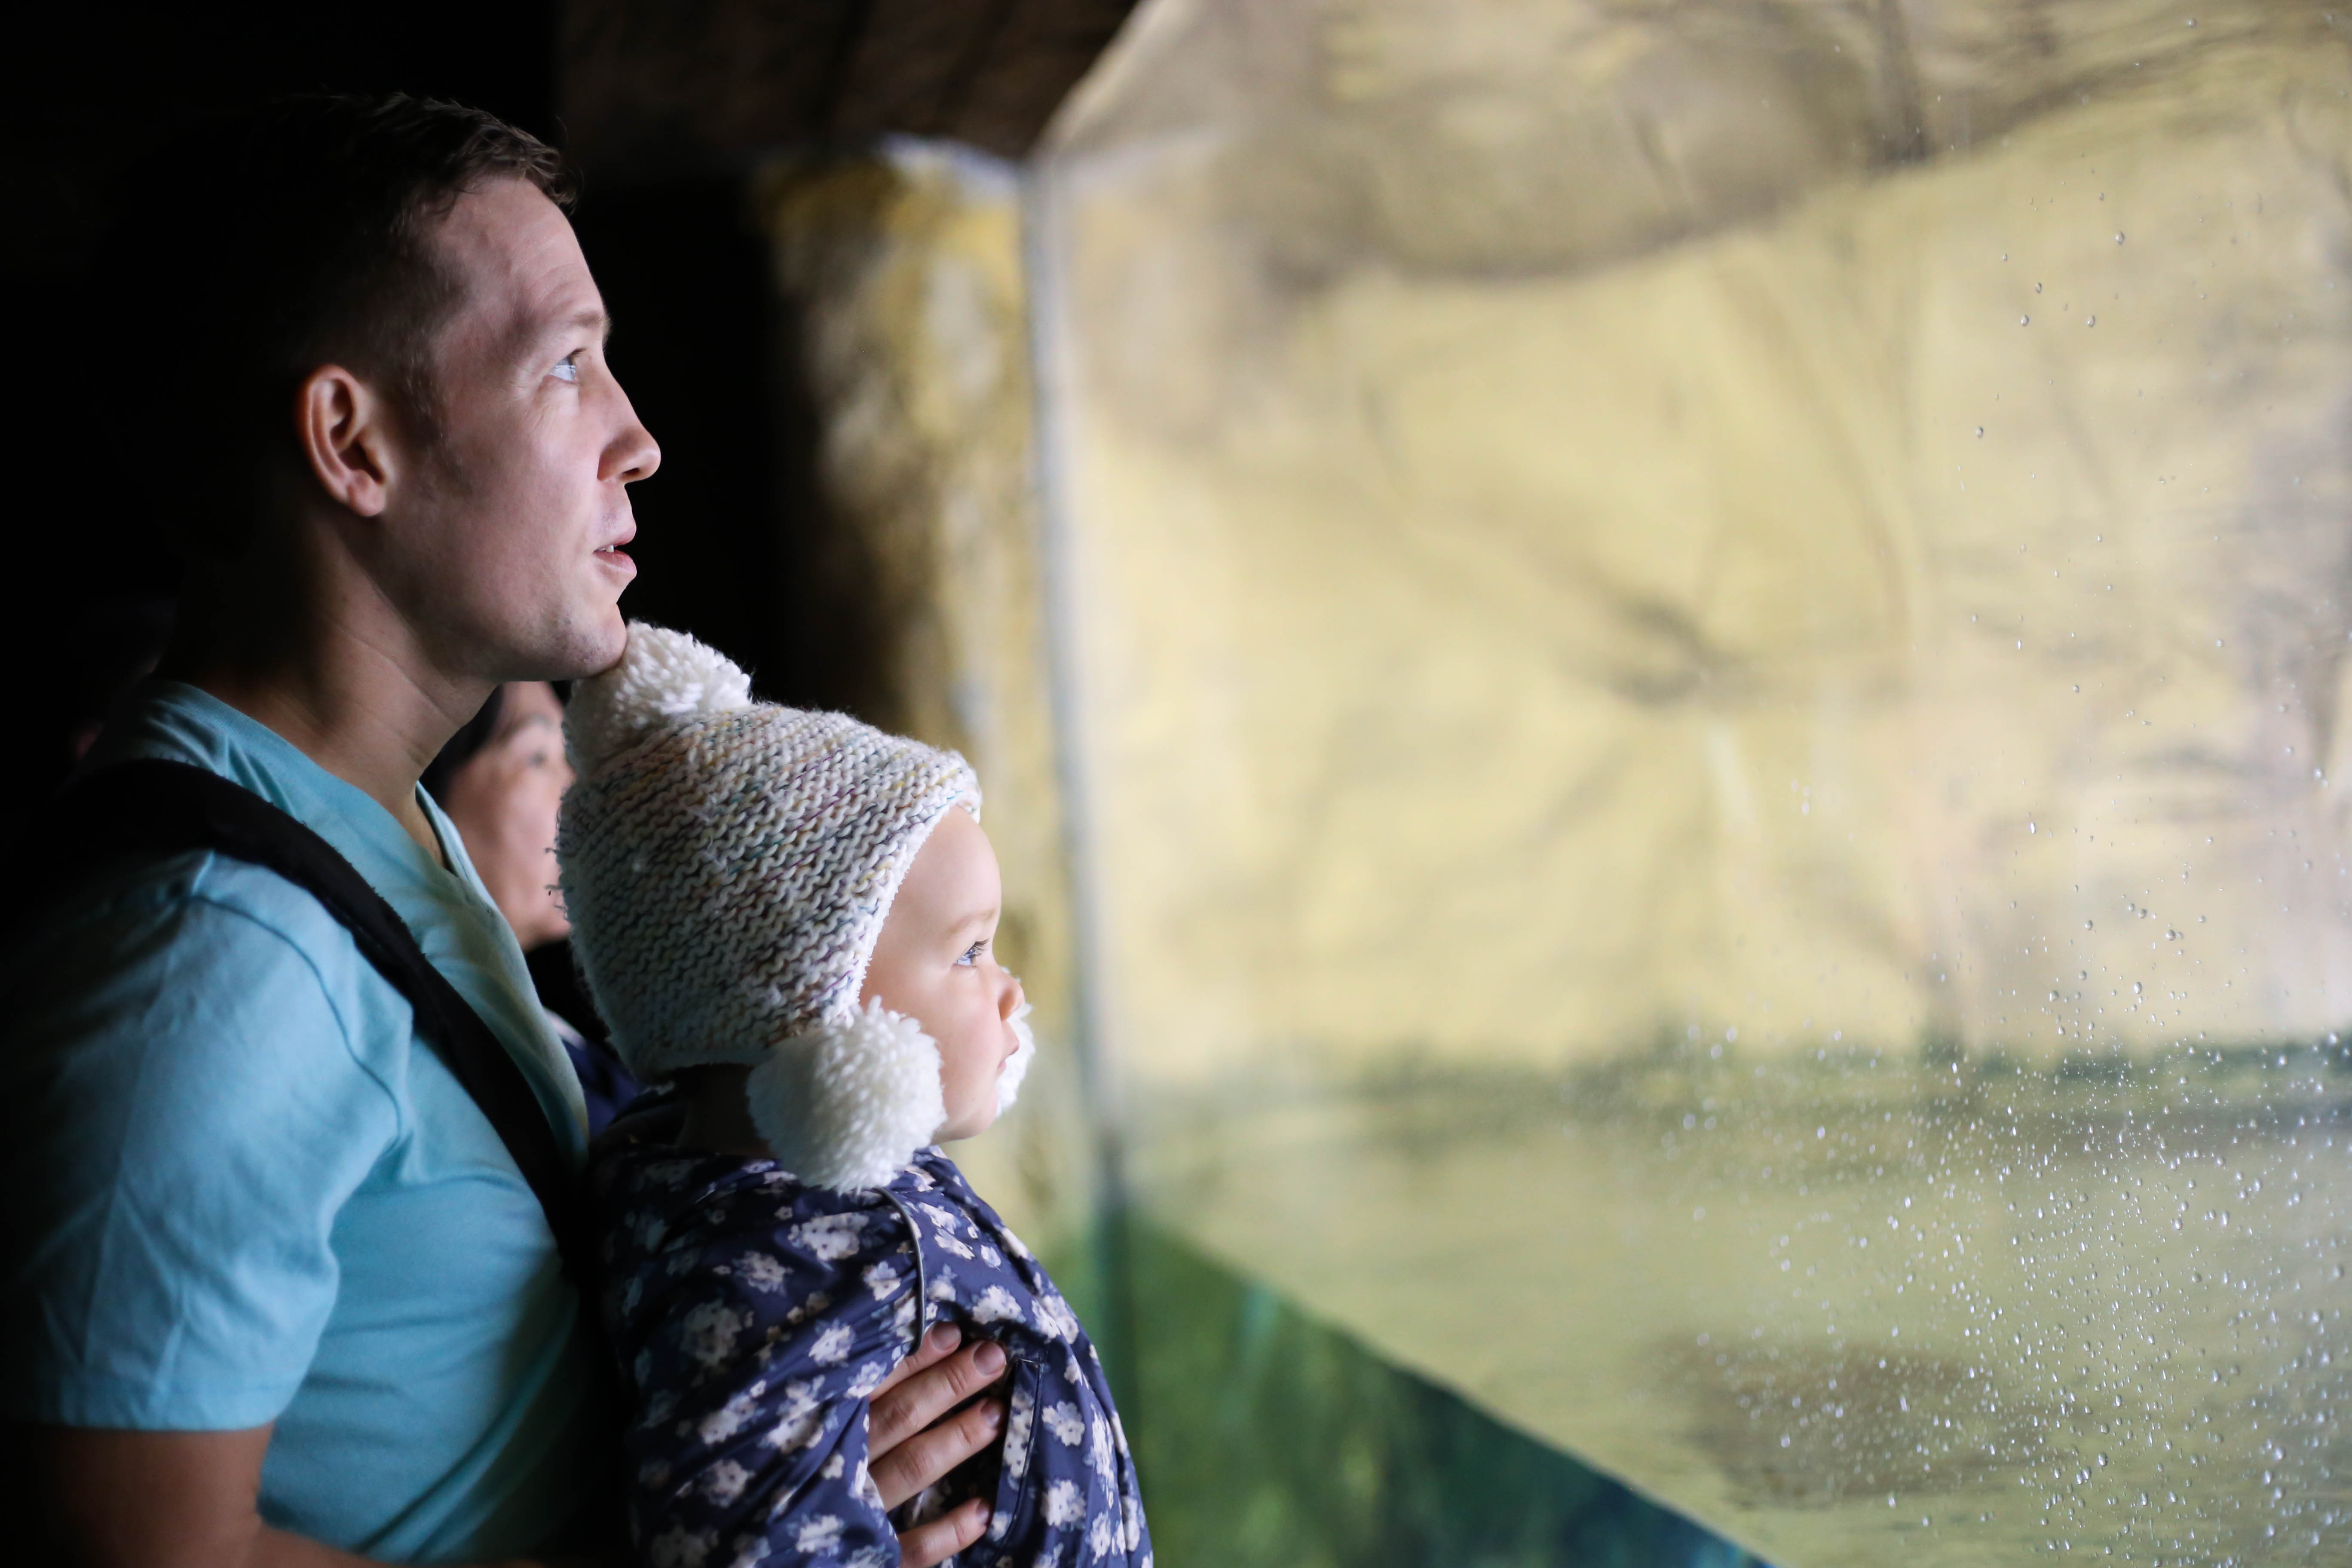
Shade – Nice, even, shade from cloud cover, tree canopies, and buildings is ideal, but other elements can work as well. See a giant, gorgeous tree trunk being blasted by direct sunlight? Walk to the other side so the tree is lit from the back, and you can place your little one in the shade of the trunk facing away from the sun. The edge of your frame might be a bit blown out, but you can capture their adorableness without harsh shadows.

Close the aperture – Restrict the amount of light that enters your camera to maintain depth and colour saturation. We generally follow the “Sunny 16” rule, and keep our apertures around 16 to keep the blues in the sky. For those of you unfamiliar with this rule, in bright sunlight, with the aperture at 16, your shutter speed should be 1 over your ISO or ASA i.e.1/250 shutter speed, ISO 250.
(F 16.0, ISO 160, shutter speed 1/60)
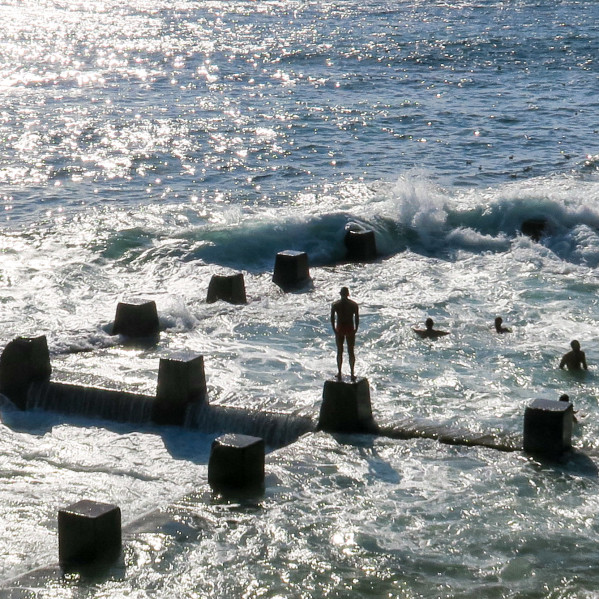
Silhouettes – Instead of fighting the blazing sun, embrace it’s awesome power. Place your subject in front of the sun shoot directly into it. This placement will create artistic silhouettes.
Backlighting – Blasting your subject from the back, with them facing away from the sun can also produce wonderful portraits. Simply expose for the shadows of a person’s face with the sun behind them, for beautiful results.
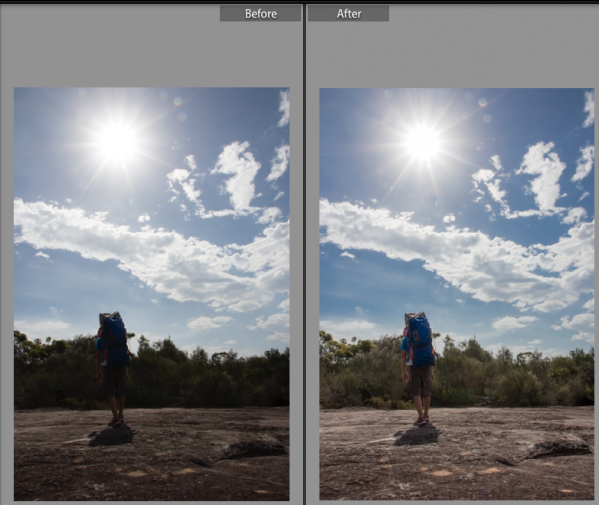
Shoot in RAW – Post-processing (editing) our photos is key to bringing out colors and contrast that we saw, even if the camera couldn’t capture the depth. Get the most mileage out of your editing by shooting in RAW format. RAW format photos are not compressed, like jpegs, so you can restore more detail that would be lost in jpeg. You should be able to change this setting directly on your camera. When you are taking the photo, expose for subject/important part of the frame instead of the overall picture. Then when you edit, bring out the details of the background. I am currently obsessed with the Dehaze function in Lightroom to bring out more color in blown-out afternoon skies.
Armed with these tips, you should have little trouble capturing your next family adventure, at any time of day. Let us know if you any questions or additional tips.
Want more? Download our guide with two bonus tips and access to all our photography tutorials!


3 Responses
[…] Go Outside – Natural light simply cannot be beat when it comes to portraits. Getting outside brings a lovely warm glow to your photos, can be an artistic feature, and also provides kids more space to run around and be active. Shadows can be problematic in the blasting summer sun, for some tips to avoid this problem, check these tips on shooting in bright sunlight. […]
[…] ISO 400 and 800 are good values for shade and very cloudy days. The reduced light in the shade, or even on a cloudy day, requires slightly higher ISO values. However, sometimes it’s preferable to shoot in the shade – especially on extremely bright days (read more tips for shooting in the bright sun) […]
[…] – Bright sunny days!!! (This is the sunny 16 rule: set your ISO and shutter speed to the same number during the brightest part of the day, and f/ 16 […]